Like many other hardware hackers, I fell in love with the ESP8266 Wi-Fi microcontroller as soon as I started using it. It is fast, has plenty of memory, has Wi-Fi networking, and can be programmed in a number of ways. Lots of people like the Lua firmware, but I prefer to use the ESP8266 core for Arduino because I can use all the great libraries already built for Arduino.
I’m also working with LoRa radio technology. Several small Arduino-based boards are available for experimenting with LoRa: Moteino and Anarduino MiniWireless have LoRa capable boards that are easy to use. They both have the standard 6-pin serial connection for easy programming. What I really wanted to do is combine long range radio technology with Wi-Fi connectivity, so I designed an ESP8266 Development board that allows for easy connection of a LoRa radio module. While I was at it, I also included connectivity for an OLED display, ArduCAM camera module, and included a nice big PL9823 RGB LED that can be controlled just like WS2812 LEDs.
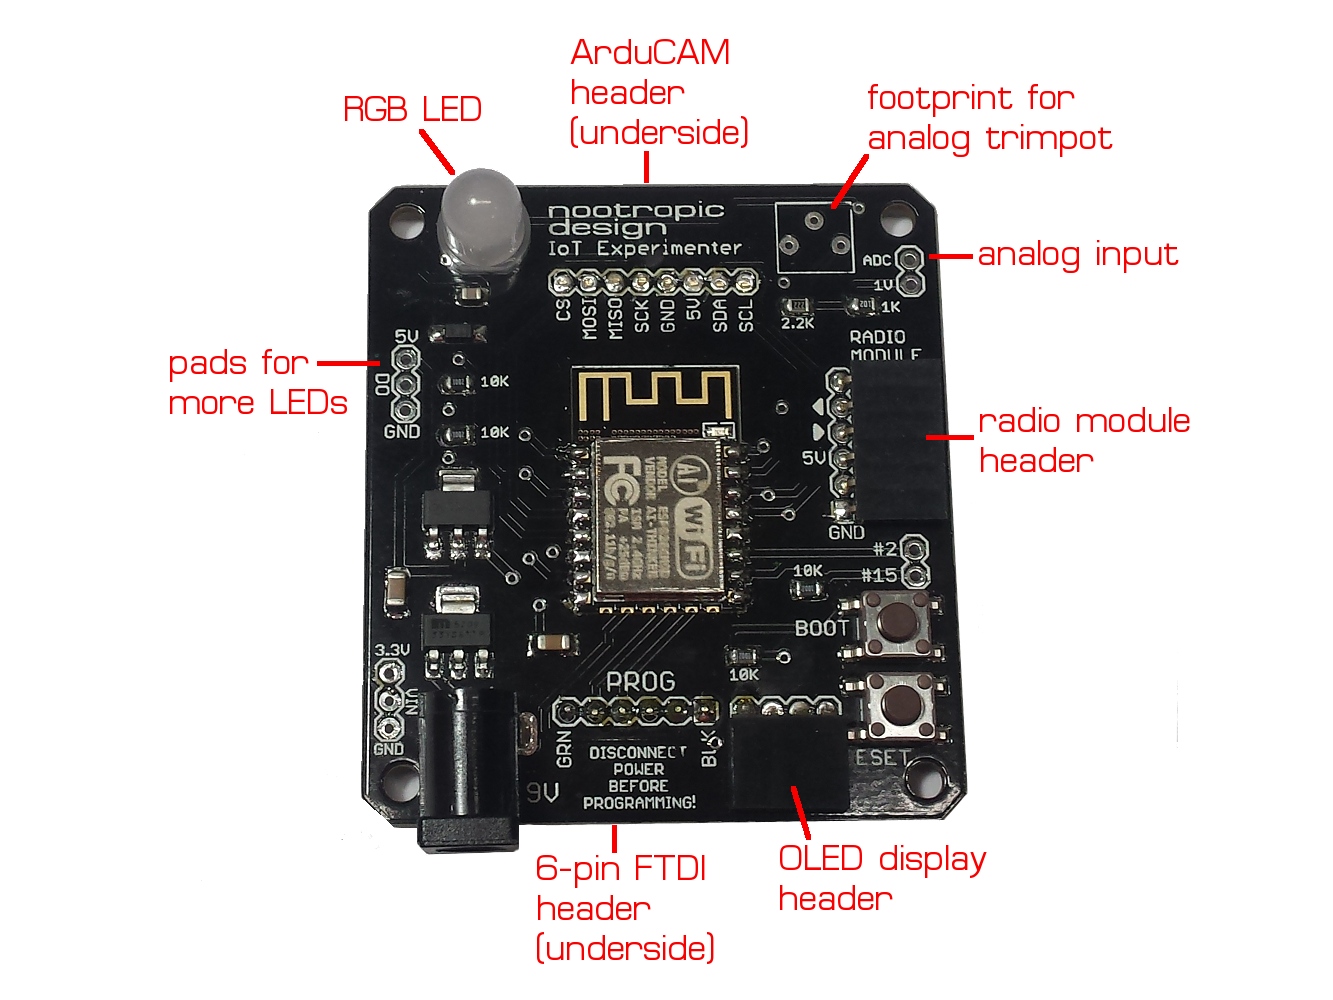
IoT Experimenter ESP8266 development board
There’s also connection for analog input with a voltage divider to scale voltage down to the 1V ranged required by the ESP8266. The board has 2 voltage regulators: a 3.3V one for the ESP8266, and a 5V regulator for powering the RGB LED and to provide power to the radio module header. If you are wondering how I drive a 5V LED with 3.3V logic from the ESP, a diode in line with the LED’s power supply drops the VCC low enough for 3.3V logic to work reliably. I learned that clever trick from this Hackaday article. If you want to connect a strip of WS2812 LEDs, there are pads for that, too.
The TX/RX serial lines for the radio module and ESP8266 are connected together for simple serial communication. This makes it easy to build a simple radio to Internet gateway. See my project Solar-Powered LoRa Weather Station for a good example of this approach. Also, this header can be used for any kind of radio (not just LoRa) that has a 6-pin header with the standard FTDI pinout. In fact, it doesn’t have to be a radio at all! Communication with any serial device might be just what you need.

Radio module attached to IoT Experimenter
The ArduCAM camera module for Arduino works great with the ESP8266 (here is the library) so I can make surveillance cameras with this board. The 8-pin female header for the camera is on the underside of the board and the camera fits great right on top of the board.
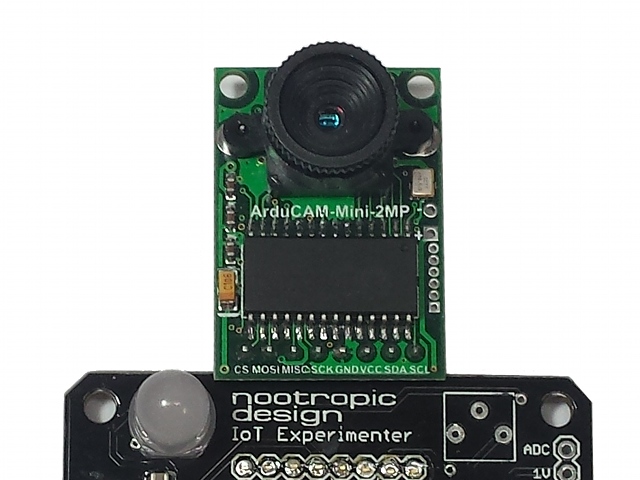
ArduCAM module attached to IoT Experimenter
I also love those cheap I2C OLED displays. They come in several colors and are only a few dollars. So I added a header for that also. It’s great for debugging, and when you are done, just pull the display off.

OLED display attached to IoT Experimenter
The PL9823 RGB LED can be controlled using any WS2812 library, like the Adafruit NeoPixel library. This big 8mm LED looks great. Make it any color you want!

RGB LED
This board has proven really useful for me in several projects, and I’m probably going to offer it as a product. Hope you like it, and if you are interested, let me know.

I hope you will have some IoT Experimnter boards available for purchase so I can incorporate it into some projects.
I do hope to bring it to market, but am just swamped at the moment. Maybe this winter. I’ll let you know.