Project source code at GitHub: wifi-camera-trap
We have lots of small wildlife around our house (mostly rabbits this year) and since I have a small camera module and a cheap PIR (passive infrared) motion sensor, I thought it would be fun to make a motion triggered wi-fi camera to deploy somewhere near the house.

Wi-Fi Camera Trap
The project is quite simple. If the PIR sensor is triggered, software on an ESP8266 wi-fi microcontroller captures an image using the ArduCAM camera module and uploads it to an image server. I wrote a very simple Node.js server that saves the uploaded images and makes them available on a gallery page for easy viewing. Nothing fancy.
Here are some of the great images we captured. The bunny’s movement triggered the PIR sensor with no problem!
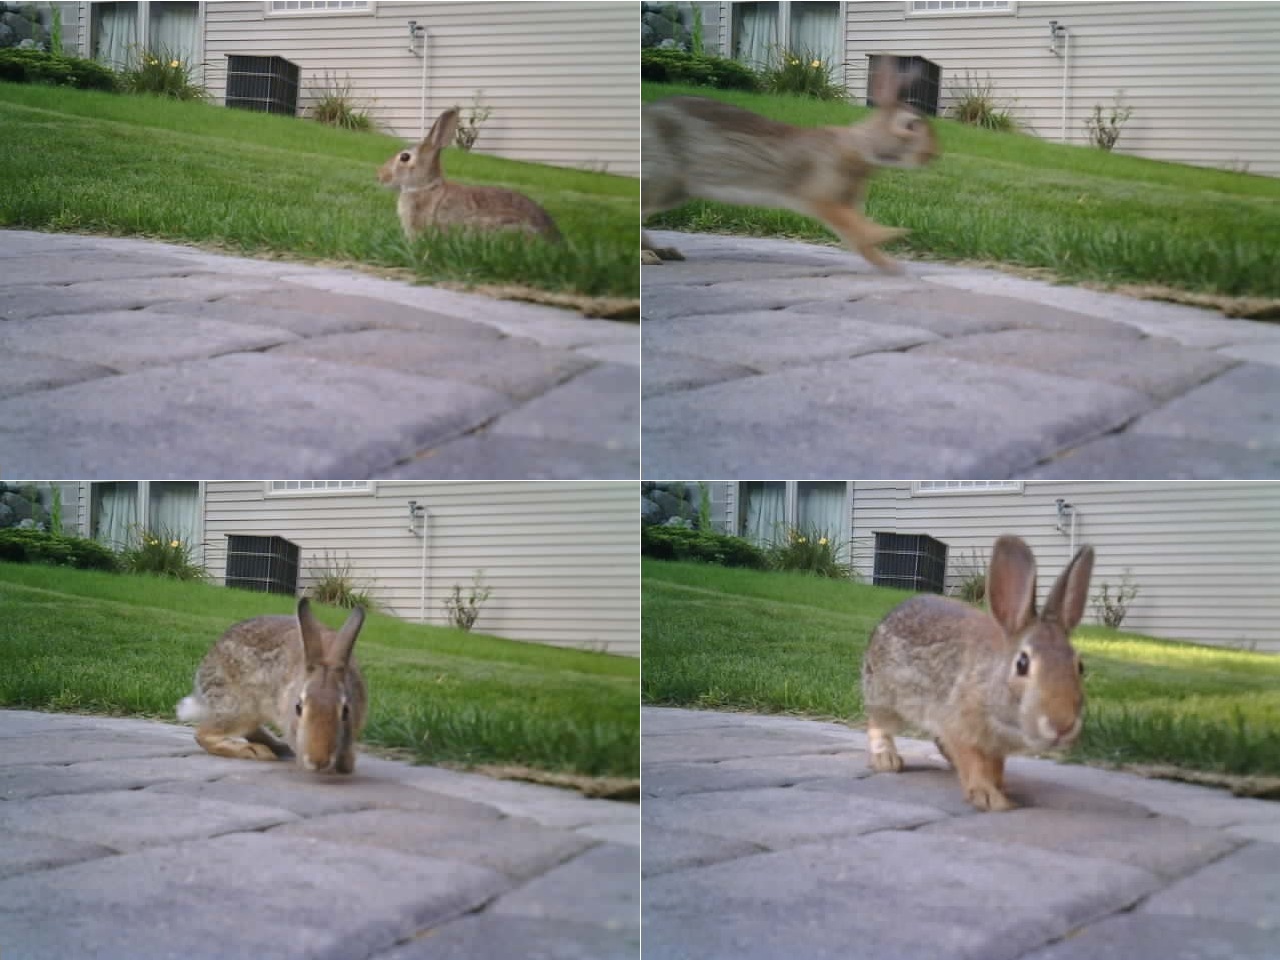
Bunnies over Wi-Fi
Inside the enclosure is an IoT Experimenter board that I designed to help me with my IoT projects. You can read more about it here. It has an ESP8266 wi-fi chip and connector for an ArduCAM module. I’m powering the whole device from a 5V battery pack. The IoT Experimenter is designed for input of 9V, but the onboard 5V regulator drops the 5V input down to about 4V, which is still fine for the camera module and PIR sensor in this project.
You can use any ESP8266 board you have. The camera connects to both the I2C and SPI pins, and the PIR sensor is connected to “Arduino pin 3” which is the RX pin on the ESP8266 but you can move it to any pin.
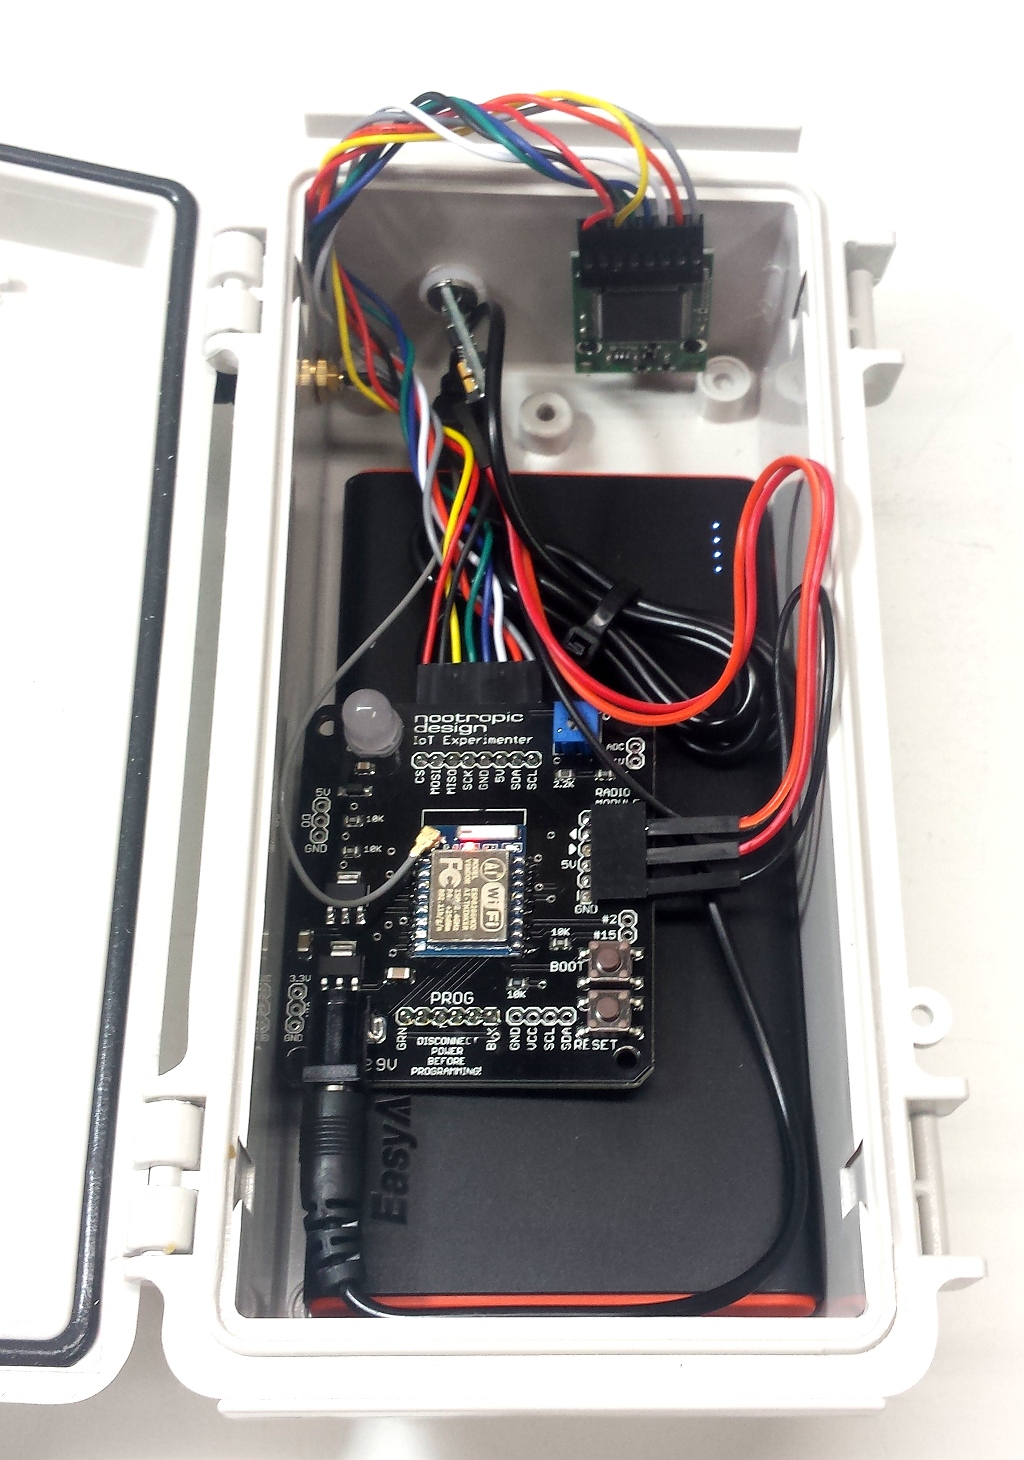
Wi-Fi Camera Trap – inside
Here’s what it looks like outside of the enclosure:
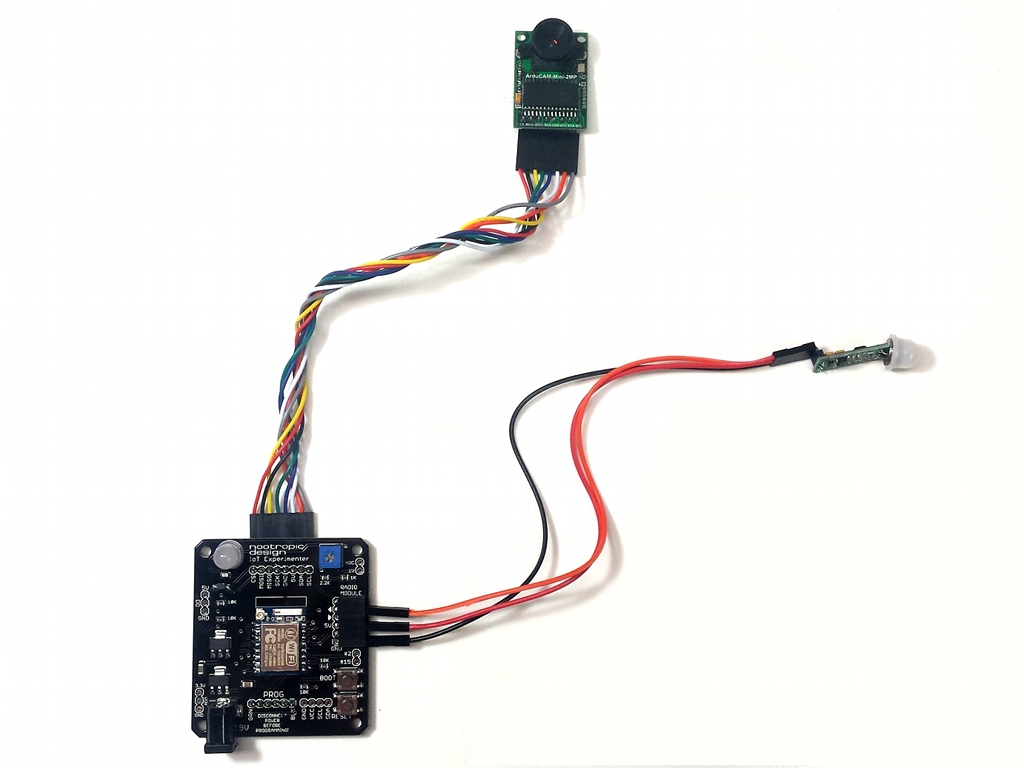
Wi-Fi Camera Trap Hardware
Here’s a closeup of the sensor. These are super cheap on AliExpress or Ebay. The output pin goes HIGH when there is new movement detected.
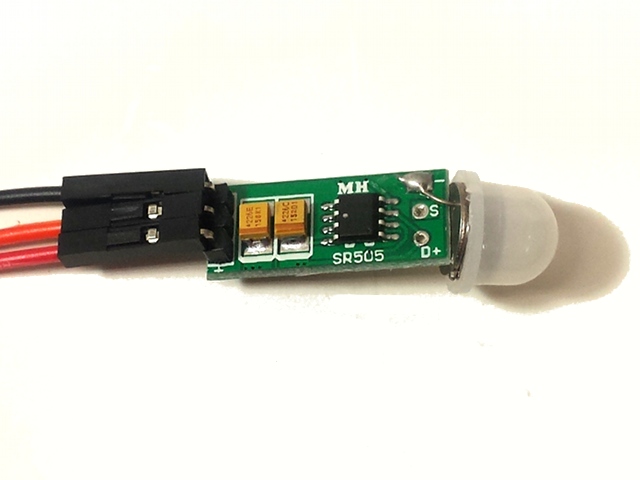
Cheap PIR Sensor
Software
I prefer to program ESP8266 chips using Arduino so I can take advantage of the hundreds of useful Arduino libraries. There’s plenty of information about using Arduino code on the ESP8266 here. This project uses the ArduCAM library control the camera module.
I’m also using the excellent WiFiManager library to make it easier to connect the ESP8266 to a network. Instead of hardcoding the SSID and password in code, if the chip can’t connect to any networks it already knows about, the WiFiManager will set up an access point (AP) named “CameraTrap”. Use your computer or phone to connect to the CameraTrap access point and a captive portal page will prompt you for your network name and password. If you aren’t automatically shown the captive portal page, just navigate to 10.0.0.200 and it will load.
After the CameraTrap code captures an image, it needs to upload it somewhere. I’ve provided a simple Node.js server for this purpose. The code POSTs the image to /upload on the image server which writes it to disk. You will have to specify the server hostname in the CameraTrap code. Note that the camera is actually installed upside down in the enclosure (so the wires fit) so my server rotates the image 180 degrees when it saves it to disk. On any machine where you can run a node server, type
node app.js
The server will run on port 8000. In any browser, just navigate to
to see the images. (Make sure you don’t accidentally include a trailing slash in the URL.)
All the software is available in the wifi-camera-trap GitHub repository. The Arduino code is in the CameraTrap directory, and the Node.js image server is in the imageserver directory.

Hi, greetings for the project, it’s very cool. A questio how is the time between the trigger and the photo?
Once triggered, the camera takes the photo right away, so there should be no real latency. A few milliseconds, maybe.