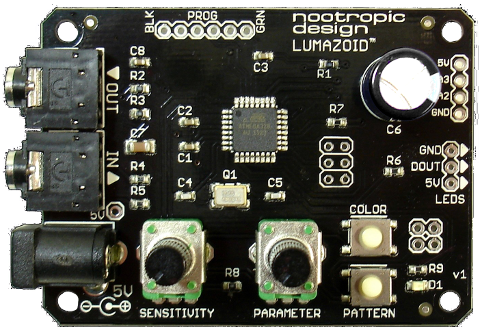
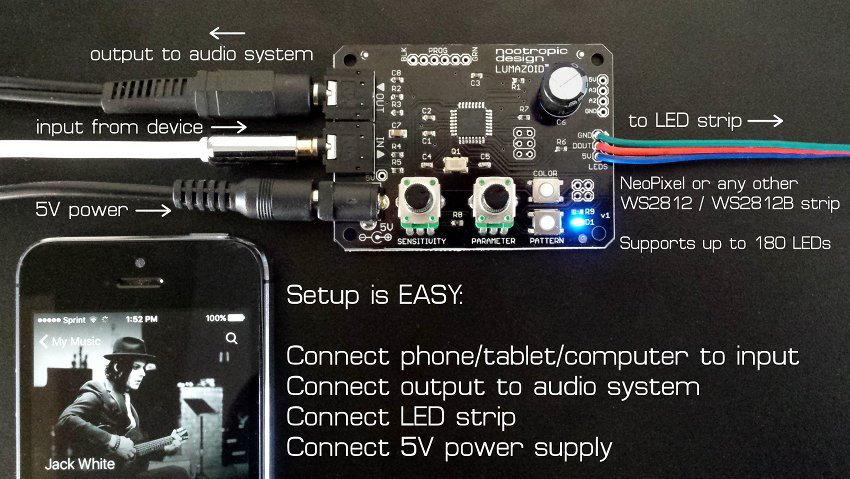
Lumazoid is a realtime music visualizer board that lets you display an awesome light show that is synchronized to your music. Just plug the Lumazoid in between your music device and your audio system, and enjoy the show!
- Works with any WS2812 / WS2812B LED strips like NeoPixel and others
- Supports 60, 120, or 180 LED strip lengths. (video below shows a 2m 120 LED strip)
- 8 different patterns + random mode that smoothly transitions between patterns
- 3 different color modes with parameter control
- Sensitivity and brightness control
- Adjustable frequency response so you can choose to visualize all frequency bands or just the bass and beat
- Programmable with Arduino
- Fully assembled and tested
Connection Guide
Input: 3.5mm (1/8″) stereo jack from phone, tablet, computer, Bluetooth receiver or other device.
Output: 3.5mm (1/8″) stereo jack to audio system like stereo receiver or amplified computer speakers.
LEDs: 3-wire connection to WS2812 / WS2812B LED strip. No wires will be connected if you buy just the board, but if you buy an LED strip from us the Lumazoid board will have a compatible wire harness connected for you.
Power: 5V, standard 2.1mm size, center positive
Technical Details
Power
The Lumazoid board requires a 5V DC power supply (available in our store). The power supply must be capable of supplying 2A of current when using the Lumazoid with 60 or 120 LEDs (for example, a 1m or 2m strip with 60 LEDs per meter). The Lumazoid firmware is carefully designed to draw less than 2A of current when used with 60 or 120 LEDs. If you use the Lumazoid with a 180 LED strip, you will require a supply that can deliver at least 3A of current, but you probably already have such a power supply if you have that many LEDs. We only sell 2A power supplies at this time.
If you design and code your own visualizations for Lumazoid, make sure you consider the current requirements of your visualization.
LED Strip Compatibility
The Lumazoid is designed for WS2812 or WS2812B LED strips. These are readily available from many suppliers (including us) and are sometimes referred to as “NeoPixel” which is Adafruit’s branding for WS2812B strips. Sometimes LED strips are referred to as “WS2811” but the name WS2811 only refers to the driver chip and not the integrated chip+LED combo. If you have an LED strip that someone called “WS2811” and it has 3 wires (5V, ground, and data) then it should work.
The Lumazoid does NOT work with other types of LED strips based on different technology like APA102 and APA104 LEDs (for example, Adafruit “DotStar” strips). Lumazoid only works with 3-wire LED strips based on WS2812 or WS2812B technology.
IMPORTANT: When connecting the LED strip to the Lumazoid, carefully pay attention to the labels for the connections (GND, DOUT, 5V). The Lumazoid DOUT connects to the LED strip “DI” or “DIN” connection. Do not assume that the wire colors will match or that the order will match! The top-to-bottom ordering of connections on the Lumazoid board is GND, DOUT, 5V, and this order may be different on your LED strip. If you buy an LED strip from us, the order will match. If you buy a Lumazoid Bundle from us (Lumazoid board, power supply, LED strip) the board will have a wire harness that is compatible with the LED strip and you have nothing to worry about.
IMPORTANT: Always connect the LED strip before connecting power. Do not connect the LED strip to a powered board.
Instructions for Use
Initial Setup Configuration
Before using your Lumazoid, you may need to configure it for your LED strip length and optionally adjust the brightness. By default, the Lumazoid is configured to use a 120 LED strip (for example, a 2m strip with 60 LEDs per meter) and is set for maximum brightness. If you have a different LED stip length or would like to reduce the brighness, follow these instructions.
Brightness: hold the color button when connecting power. A rainbow of LEDs will be displayed on the first 8 LEDs. Use the parameter knob to change the brightness. When finished, press the color button again and your configuration will be saved to memory. This will be remembered even if power is disconnected.
LED strip length: hold the pattern button when connecting power. One, two, or three red LEDs will be displayed. Used the parameter knob to choose your LED strip configuration based on the number of red LEDs:
- 60 LEDs
- 120 LEDs
- 180 LEDs
When finished, press the pattern button again and your configuration will be saved to memory. This will be remembered even if power is disconnected.
Volume and Sensitivity Adjustment
Lumazoid works best when your music device volume is set to a high level. Smaller devices like phones and tablets will need their volume turned up to the highest level. Use the sensitivity knob to adjust the sensitivity of the Lumazoid. Small devices will require a higher sensitivity setting. A music device like a computer may not need a high sensitivity at all. Just experiment with your device to ensure that Lumazoid is responding to the music the way you desire.
Patterns, Color Modes, and Frequency Response
Lumazoid lets you choose from different LED patterns and color modes. You can also adjust the frequency response.
Patterns: Lumazoid has different display patterns for visualizing the audio signal peaks (high amplitude) detected in music. Lumazoid is like a graphic equalizer that shows the strength of different frequency bands, but Lumazoid displays the information in a much more interesting way. There are 8 different patterns for displaying the audio peaks in the music. Press the pattern button to cycle through them. A white LED indicates which pattern is selected. The 9th pattern is “random” mode which is indicated by a red LED. This mode changes the pattern randomly with a random time interval. The 8 patterns are:
- Dance Party: Audio signal peaks are emitted from the center of the strip and fade out as they approach the ends. The speed of the peak is proportional to the audio signal magnitude of that peak.
- Dance Party 2: Same as Dance Party but the signal peaks are emitted from one end.
- Pulse: Signal peaks are displayed as bright pulses that come from the center of the strip. The width of the pulse is based on signal peak magnitude.
- Light Bar: Signal peaks illuminate the entire strip. There is some subtle color variation between LEDs and some motion to make it more interesting.
- Color Bars: Signal peaks displayed as colored bars that fade out.
- Color Bars 2: Similar to Color Bars but each bar shrinks in size as it fades out.
- Flash Bulbs: Signal peaks are displayed as a single-LED flash at a random location. The initial color is white and then fades as a different color.
- Fireflies: Signal peaks displayed as single LEDs at a random location and they move left or right as they fade out. Their speed is based on the signal peak magnitude.
Color Modes: Lumazoid has 3 different color modes. Press the color button to cycle through them. The chosen mode is indicated by a blue LED at the beginning of the strip.
- Random two-color scheme: Two random colors are chosen and are used to display the signal peaks. Over time, new colors will be chosen. Use the parameter knob to control how fast the color schemes change. If the parameter knob is set to the highest level, the colors will change constantly, therefore giving each signal peak a new color. Setting the parameter to the midpoint is a good position for this color mode.
- Rainbow cycling: All signal peaks are displayed as the same color (with a small amount of random variation) and the color shifts through the rainbow over time. Use the parameter knob to control how fast the color shifts through the rainbow.
- Frequency color: In this mode, each signal peak is colored depending on the frequency band of that peak. The lowest band is red, with higher frequency bands moving up the spectrum. There are 8 frequency bands: red, orange, yellow, green, cyan, blue, magenta, white. This color mode is most interesting when the frequency response of the Lumazoid is set to respond to all frequency bands (see below). If the frequency response is set to only respond to bass frequencies, then only red/orange/yellow peaks will be displayed in this mode.
Frequency Response: You can control which frequency bands the Lumazoid responds to. To set the frequency response, press and hold both the color and pattern buttons. Use the parameter knob to select how many of the 8 frequency bands will be visualized by the Lumazoid. If you want to only visualize the bass and beat of the music, set the frequency response to only the lower 2 or 3 bands. If you want to visualize all the frequencies in the music (like vocals and higher-pitched instruments), select all the frequency bands.
Some Suggested Settings
- Dance Party or Dancy Party 2 pattern, color mode = 1 (two-color scheme), parameter knob set to midway, frequency response set to lower 3 frequency bands. This creates two-color schemes that change over time.
- Dance Party or Dancy Party 2 pattern, color mode = 3 (frequency colors), frequency response set to include all frequency bands. This setting lets you really visualize the different components of the music. The beat will be red/orange, vocals cyan/blue/magenta, etc.
- Random pattern mode, color mode = 1, parameter knob set to highest level. Each signal peak will be a random color, which looks good on lots of the patterns.
- Random pattern mode, color mode = 2 (rainbow cycling), parameter knob set to mid-high level. All peaks the same base color (with some random variation) and the base color shifts through the rainbow.
Source Code
The Lumazoid source code is open source and available on GitHub.