
Arduino shield for realtime audio processing
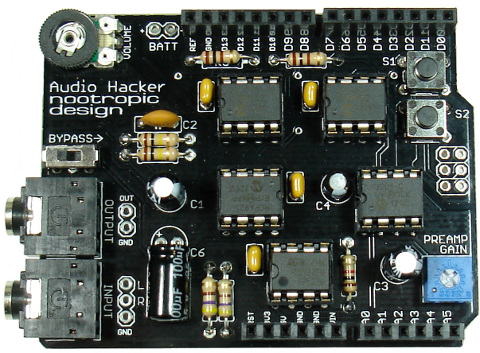
The Audio Hacker shield for Arduino allows you to perform realtime digital signal processing. Record audio samples into memory and play them back. Mix samples, manipulate audio, build audio effects, or synthesize entirely new sounds. All with Arduino programming!
- High quality 12-bit ADC and 12-bit DAC. Realtime ADC sampling and output to DAC at 44.1 kHz.
- 256K SRAM for recording/playback of audio samples. No SD card is needed! High-speed SRAM allows fast access to audio data for realtime processing and mixing.
- Record about 9 seconds of high quality audio at 22 kHz with 12-bit resolution to SRAM. Much longer samples can be recorded at lower frequency and/or resolution. See memory capacity below.
- Rail-to-rail op-amp provides high current output and up to 100X gain preamp for weak inputs.
- Two onboard buttons for input, bypass switch, volume knob.
- Connection for 3V battery backup to retain samples in memory.
- Compatible with Arduino Uno, Duemilanove, Mega, and Leonardo. Uses digital pins 5-13.
- Easy to assemble kit! Available assembled in limited quantities.
The optional DJ Shield (sold separately) can be added on top to give you 5 buttons, 3 potentiometers, and two indicator LEDs. It’s not required to use with the Audio Hacker but it makes it easier to do projects that require more controls.
See the DJ Shield product page for more info.
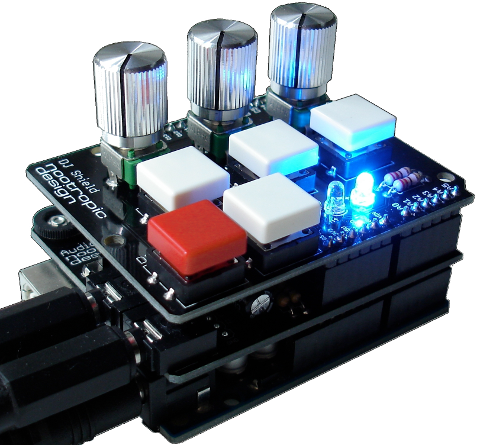
This video shows only a few of the many fun projects you can do with the Audio Hacker. See the projects page for a collection of great projects.
Board Features
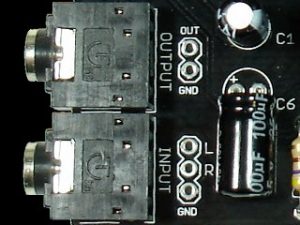
Audio input and output 3.5mm stereo jacks and solder pads. The stereo input is converted to mono, and the output is always mono. Solder pads are provided for input and output in case you want to use different types of connectors.
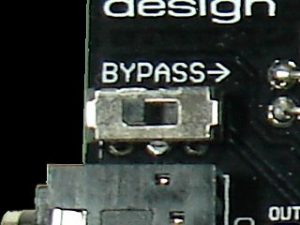
The bypass switch allows you to hear the input signal (after it has been converted to mono) on the output. This switch allows you to compare the original signal with the processed output of the Audio Hacker.
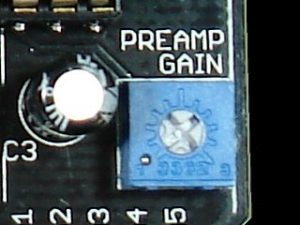
Preamp gain allows you to amplify weak input signals. For inputs from an MP3 music player (e.g. iPod) or computer, this potentiometer should be set to its lowest level (no gain).
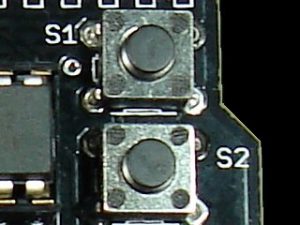
Two buttons provided for user input. These are connected to digital pins 5 and 6.
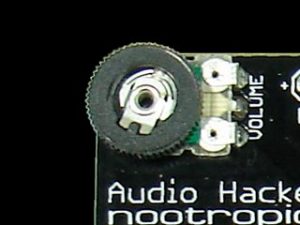
Small volume knob for the output level of the processed signal.
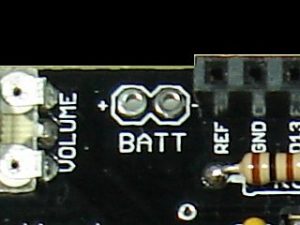
Battery connection allows you to keep your audio samples in non-volatile memory when power is disconnected. A simple 3V coin cell battery (e.g. CR2032) is sufficient to retain the memory contents. See this project for more details.
Usage Guide
Input Settings
The Audio Hacker has a preamplifier that can be used to amplify weak signals. The input should only be amplified if the incoming signal is very weak. For output from a computer or MP3 player, don’t amplify the signal.
| Input Type | Input Device Volume | Audio Hacker Preamp Setting |
|---|---|---|
| Computer or MP3 player (iPod) | Set computer or MP3 player volume to a very high level | Set preamp gain to LOWEST level (no gain). |
| Electret microphone | N/A | Adjust preamp gain to get desired signal amplification |
| Electric guitar | Set guitar volume to a high level | Adjust preamp gain to get desired signal amplification. |
Output Settings
The Audio Hacker has a volume knob to control the output signal strength. DO NOT connect the Audio Hacker output to large unamplified speakers. It can drive a small 8 ohm speaker, but for big sound only connect it to a stereo receiver system or amplified (powered) computer speakers.
| Output Device | Audio Hacker Volume Setting | Output Device Volume Setting |
|---|---|---|
| Stereo receiver or powered computer speakers | Set volume potentiometer to highest level. | Adjust to desired level. |
| Headphones | Start at low level and increase to desired volume. | If your headphones have a volume setting, you may try to set the Audio Hacker volume higher, then turn down the headphone settings. This may provide better quality. |
| Small 8 ohm speaker | Start at low level and increase to desired volume. | N/A |
Bypass Switch
The bypass switch should be in the left position (no bypass) to use the Audio Hacker. To hear the original (dry) signal on the output, move the switch to the right position to bypass the Audio Hacker circuitry. The signal on the output will still be converted to mono, but will be otherwise disconnected from the Audio Hacker circuitry.
Memory Capacity
The Audio Hacker has 256K of serial SRAM to store audio samples. You can store multiple samples if you divide the memory into banks or chunks, but there is an upper bound on the total amount of audio that can be recorded.
The amount of audio that can be stored depends upon the sample rate and the bit resolution. Both of these affect the quality of the audio. Higher quality means less capacity. If lower quality audio is sufficient for your project, you can store much longer samples. This project lets you dynamically change the sampling rate and bit resolution so you can hear the difference in realtime. The table below shows how sample rate and bit resolution affect the audio capacity.
| Sample Rate | Resolution | Total Sample Length | Notes |
|---|---|---|---|
| 22 kHz | 12 bits | 8.6 seconds | very highest quality, good music reproduction |
| 20 kHz | 12 bits | 9.4 seconds | high quality, good music reproduction |
| 18 kHz | 12 bits | 10.4 seconds | good quality, suitable for music |
| 16 kHz | 12 bits | 11.6 seconds | some noise may be audible with music |
| 12 kHz | 12 bits | 15.2 seconds | audible noise with music, may be suitable for voice |
| 8 kHz | 12 bits | 22.5 seconds | more noise, may be suitable for some voice recording projects |
| 22 kHz | 8 bits | 12.9 seconds | good quality, music still sounds OK |
| 20 kHz | 8 bits | 14.1 seconds | OK quality, music still sounds OK |
| 18 kHz | 8 bits | 15.6 seconds | OK quality, more noise |
| 16 kHz | 8 bits | 17.4 seconds | suitable for voice recordings |
| 12 kHz | 8 bits | 22.8 seconds | may be suitable some voice recording projects |
| 8 kHz | 8 bits | 33.6 seconds | more noise, may be suitable some voice recording projects |
A Note About Performance Constraints
An Arduino is fast enough to sample an audio input with the ADC and recreate the signal on the output DAC at a rate of 44.1 kHz with 12-bits of resolution. However, when recording the sampled audio to SRAM, the sample rate is limited to about 22 kHz because it takes extra time to communicate with the memory chips. The more you try to do when processing audio, the lower the sample rate must be in order to have enough time for the audio processing. Some Audio Hacker projects use a lower sample rate and/or a lower bit resolution to achieve the speeds needed for the project. For example, the 3-track looper project uses a sample rate of 18 kHz and 8-bit audio in order to have enough time to read three tracks from memory and mix them together.
Audio Hacker Library
The Audio Hacker library makes it easy to access the different functions of the shield and comes with many example projects. There are API functions for reading the ADC, writing output to the DAC, and reading/writing the serial SRAM memory. By looking at the example projects and reading the API documentation below, you can learn how to write your own Audio Hacker programs. The 8-bit sampler is a good project to start with to learn about the libary.
Download the library
Instructions for installing an Arduino library can be found on the Arduino web site. After installing, the structure should look like this:
libraries
    |
    + AudioHacker
        |
        + AudioHacker.h
        |
        + AudioHacker.cpp
        |
        + examples
           |
           [many example sketches...]
Library API
begin() : initializes the Audio Hacker shield
readADC() : read the voltage on the ADC and return a 12-bit value. Returns an unsigned int in the range [0-4095].
readADC_8bit() : read the voltage on the ADC and return an 8-bit value. Returns an byte in the range [0-255]. The least significant 4 bits of the 12-bit ADC reading are discarded.
writeDAC(unsigned int output) : write a 12-bit value in the range [0-4095] to the DAC.
writeDAC_8bit(byte output) : write an 8-bit value in the range [0-255] to the DAC. The actual value written to the DAC is 12 bits in the range [0-4095] with the lower four bits as 0.
writeSRAM(byte chipNumber, long address, byte data) : write a byte to the memory on one of the two SRAM chips. Chips are numbered 0 and 1. Address range is [0-131071].
writeSRAM(byte chipNumber, long address, unsigned int data) : write a 16-bit value to the memory on one of the two SRAM chips. Chips are numbered 0 and 1. Address range is [0-131070]. The two bytes of the unsigned int will be stored at address addressand address+1.
writeSRAM(byte chipNumber, long address, byte *buf, int len) : write multiple bytes to the memory on one of the two SRAM chips. Chips are numbered 0 and 1. len specifies the number of bytes from the buffer to write. Address range is [0-(131071-(len-1))].
writeSRAMPacked(byte chipNumber, long address, unsigned int data1, unsigned int data2) : store two 12-bit audio samples efficiently in 3 bytes of SRAM by “packing” the data efficiently. The two 12-bit values data1 and data2 will be packed into 3 bytes by discarding the upper 4 bits of each unsigned int. Chips are numbered 0 and 1. Address range is [0-131069]. The data will be stored at addresses address, address+1, and address+2.
| address | address+1 | address+2 | |||
| data1 | data2 | ||||
readSRAM(byte chipNumber, long address) : read a byte from memory. Chips are numbered 0 and 1. Address range is [0-131071]. The return value is the byte read.
readSRAM(byte chipNumber, long address, byte *buf, int len) : read multiple bytes from memory into buffer buf. Chips are numbered 0 and 1. len specifies the number of bytes to read into the buffer. Address range is [0-(131071-(len-1))].
readSRAMPacked(byte chipNumber, long address, unsigned int *buf) : read two 12-bit audio samples from 3 bytes of SRAM. The two 12-bit values are packed into 3 bytes by discarding the upper 4 bits of each unsigned int. Chips are numbered 0 and 1. Address range is [0-131069]. The data will be read into buf[0] and buf[1].
| address | address+1 | address+2 | |||
| buf[0] | buf[1] | ||||
